Artifex Fabricatum
Rustland's Wolves - Fire Masters
Rustland's Wolves - Fire Masters
Couldn't load pickup availability
The Fire Masters are the Rustlands Wolves' dedicated heavy weapon specialists, four fighters who carry the kind of firepower that ends arguments before they start. Sculpted by 42studio, each figure stands at 32mm and arrives as a physical resin miniature with supports already removed and cleaned, ready to assemble and paint.
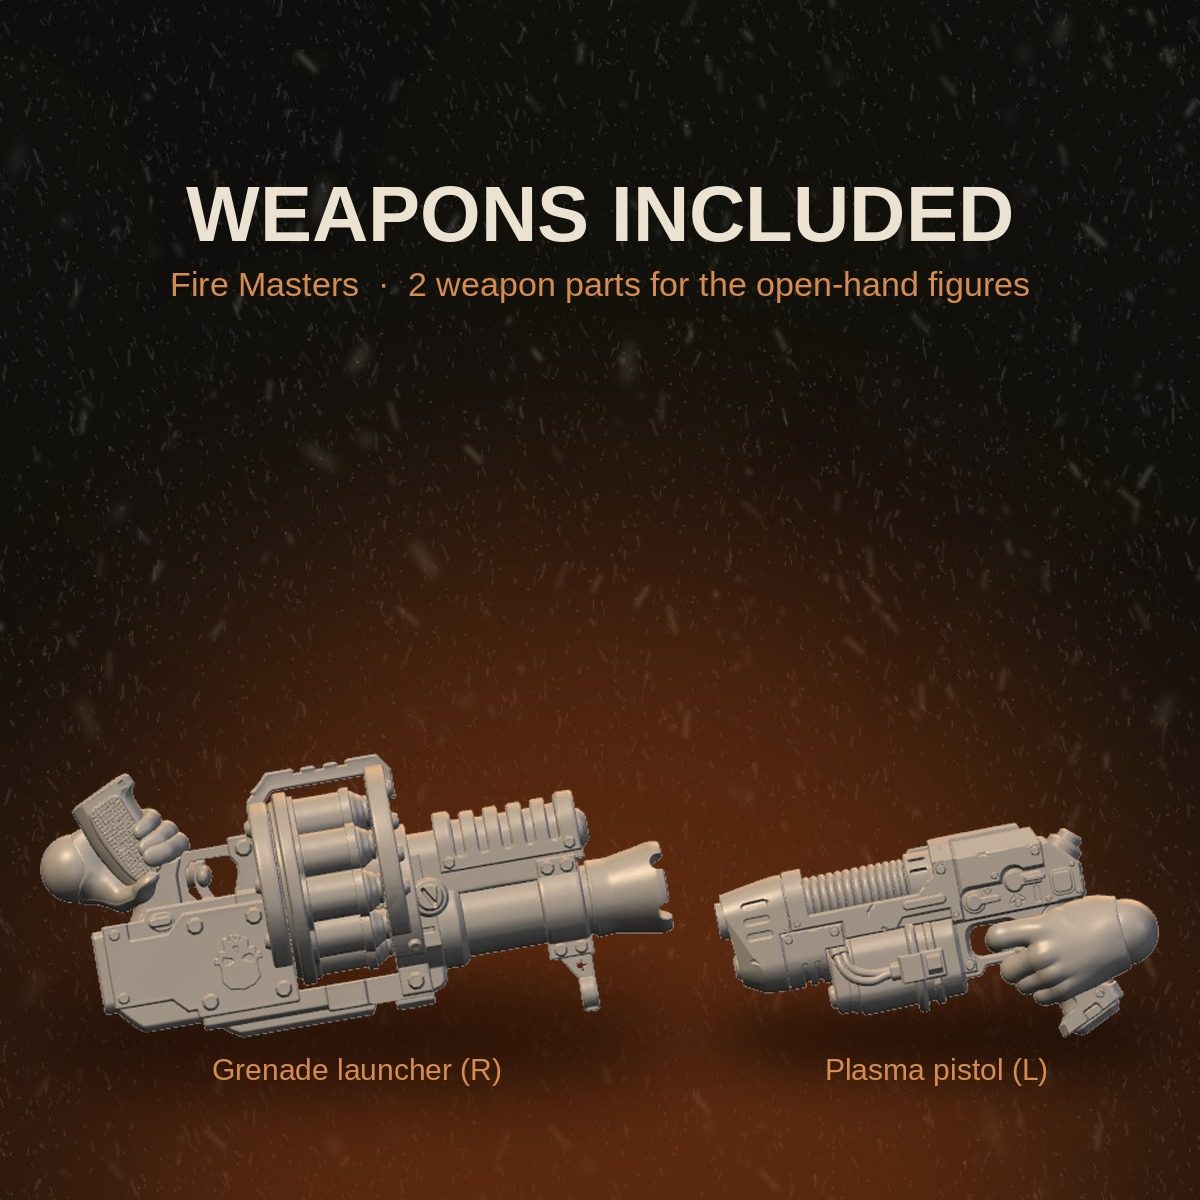
The squad covers the full spread of battlefield roles. A compact, helmeted gunner drops into a wide firing stance and puts a carbine on target with both hands. A broad-shouldered bruiser in a tattered coat hauls a chunky assault weapon at the hip, his bearded face set with the easy confidence of someone who has done this a hundred times. A bare-armed fighter in a crop top braces a belt-fed heavy weapon and scans the horizon. The fourth member goes wide, arms extended, one hand on a grenade launcher and the other on a plasma pistol, weapons included as separate parts so you can pose her exactly as shown or adapt the fit to your preference.
Two weapon parts are included for the open-handed figure: a grenade launcher for the right arm and a plasma pistol for the left. All four miniatures fit naturally alongside the rest of the Rustlands Wolves range.
Supplied unpainted. Out in the Rustlands, respect is measured in calibre, and the Fire Masters carry plenty of both.
Painting Guide: Rustland's Wolves Fire MastersThe palette below leans into the sun-bleached, rust-bitten look of the wider warband. Work squad by squad and keep the weathering consistent across all four figures so they read as a unit on the table.
1. Prime
- Spray with a dark grey or black primer for maximum contrast on the deep panel lines and armour rivets.
- A zenithal coat of light grey or off-white from above helps map out highlight placement before paint goes on.
2. Armour Base
- Base the armour panels in a dark, muted olive or military green for the more uniformed fighters.
- For the coated bruiser, use a worn leather brown as the primary fabric tone and build up with lighter drybrush passes.
3. Trim and Details
- Pick out buckles, clasps, and belt hardware in a dull silver such as Leadbelcher or equivalent.
- Wash all armour and fabric with a brown or sepia shade to knock back the highlights and push grime into the recesses.
4. Weapons
- Base all weapon bodies in dark metal, then drybrush with a brighter silver to catch the raised edges of vents and barrel details.
- The grenade launcher and plasma pistol benefit from a spot colour on the energy coils or barrel tip, a pale blue or sickly green works well against the otherwise muted palette.
5. Weathering
- Apply chipping with a small sponge dipped in dark brown, concentrating on armour edges, knee pads, and boot toes.
- Streak rust tones downward from rivet heads and along the lower legs using a thin, stippled coat of orange-brown.
6. Bases
- Texture paste in a cracked earth or rubble mix ties the squad to the wasteland setting. Finish with a thin coat of dust pigment, fixed with isopropyl alcohol, to unify the base colour across all four figures.
This is an adult hobbyist collectible, not a toy. Not suitable for children under 14 years due to small, detailed parts.
 Designed by
42studio
View all 36 miniatures
Designed by
42studio
View all 36 miniatures