Artifex Fabricatum
The Impaled Knight - Monster - 32mm Resin Miniature
The Impaled Knight - Monster - 32mm Resin Miniature
Couldn't load pickup availability
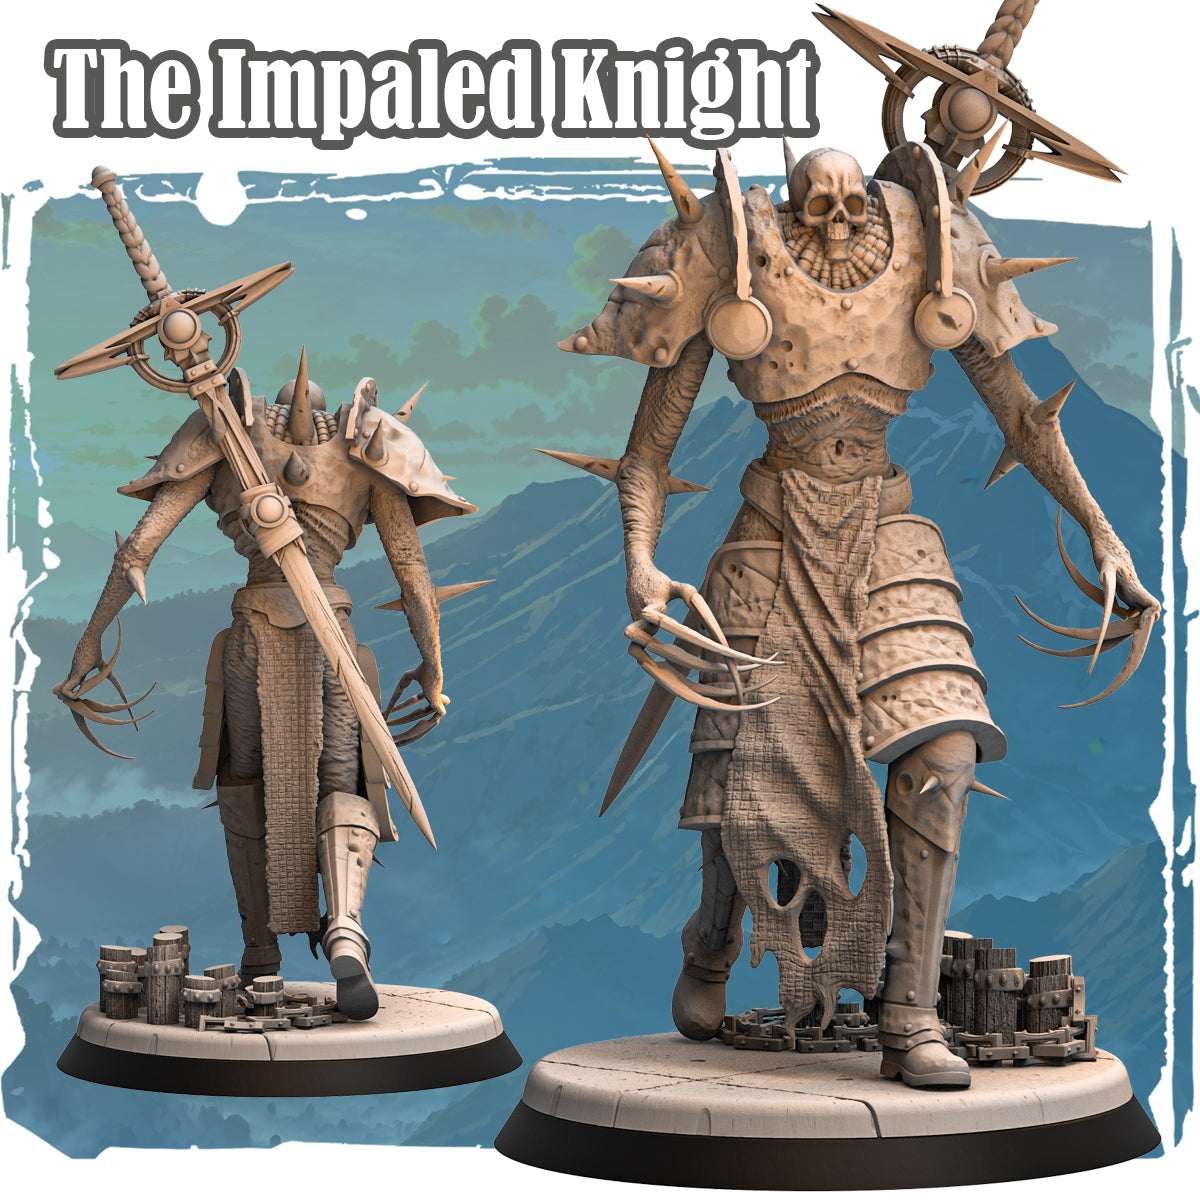
The Impaled Knight is a towering undead horror rendered in high-detail resin, arriving as a fully printed and cleaned physical miniature ready for assembly and painting. Standing at approximately 75mm to the top of its ornate weapon, this single-model release commands immediate attention on any tabletop. The sculpt captures a cursed warrior encased in baroque, spike-laden armour, its chest plate bearing a grinning skull motif and its gauntleted hands ending in long, predatory claws.
Every surface of this miniature rewards close inspection. The armour is layered with rivets, tears, and embedded spines. A massive cruciform blade rises from behind the figure, bound to its form as both weapon and torment. Tattered fabric wraps the lower body in decayed strips, suggesting a warrior who has long since passed beyond death but refuses to fall. The base features ruined stonework and scattered debris, adding immediate narrative context without any additional modelling required.
The Impaled Knight is sculpted by Haito, whose eye for baroque detail and undead character shines throughout every surface of this piece. The Impaled Knight ships with supports already removed and surfaces cleaned, so you can move straight to assembly and priming. It suits grimdark undead warbands, cursed champion roles, or as a centrepiece monster in skirmish and mass-battle games. This miniature is sold as a physical resin kit and is not a digital file.
Squad size: 1 model. Scale: approximately 32mm heroic base scale with an oversized, large-monster footprint on a 60mm oval base.
Painting Guide: The Impaled Knight - MonsterThe palette below leans into bone, corroded iron, and dried blood to reinforce the cursed, undying aesthetic of The Impaled Knight.
1. Prime
- Apply a black or dark grey primer spray evenly across all surfaces, paying attention to the recesses between spines and armour plates.
- Follow with a zenithal highlight of off-white from directly above to establish instant depth before painting begins.
2. Armour Base
- Basecoat all armour panels with a dark leadbelcher or gunmetal grey, keeping coverage thin so the black primer shows in the deepest recesses.
- Wash the entire armour surface with a diluted black-brown shade to settle into every crevice and unify the tones.
3. Trim and Details
- Pick out the skull motif on the chest plate with pale bone, building up from a mid-tan base to a near-white highlight on raised edges.
- Paint the rivets and circular boss details in a warm bronze or aged gold, then shade them with a brown wash for an oxidised finish.
4. Weapons
- Basecoat the great sword blade with a mid-grey steel, then edge-highlight the sharpened ridges with a bright silver to suggest a weapon that still holds its deadly edge despite years of ruin.
- Add a thin glaze of muted purple or green along the flat of the blade to hint at a corrupting enchantment.
5. Weathering
- Apply chipping fluid or a sponge technique with a dark brown-black mix across armour edges to simulate battle damage and extreme age.
- Stipple rust streaks downward from rivets and joints using a terracotta orange thinned with water, then glaze over with a brown shade to knock it back.
6. Bases
- Drybrush the stonework base with successive layers of mid-grey and off-white to lift the ruined texture, then apply a dark brown wash to the wooden debris for contrast.
- Finish with a light static grass or pale tufts at the edges of the base to break the stone monotony and ground the model visually.
This is an adult hobbyist collectible, not a toy. Not suitable for children under 14 years due to small, detailed parts.
Share