Artifex Fabricatum
Dinofelis WTV D8 - 18-Part Resin Miniature Vehicle
Dinofelis WTV D8 - 18-Part Resin Miniature Vehicle
Couldn't load pickup availability
“Six wheels and a hull thick enough to keep the ash out for another hour, which is all anyone asks of anything now. The turret jammed twice on the way in and still put down every gun on the ridge.”
The Dinofelis WTV D8 is a hulking, six-wheeled armoured transport sculpted with an exceptional level of grimdark detail, arriving as a physical resin miniature ready to assemble and paint straight out of the box. Supports have already been removed and surfaces cleaned, so you can get straight to the hobby the moment it lands on your doorstep.
Supplied unpainted.
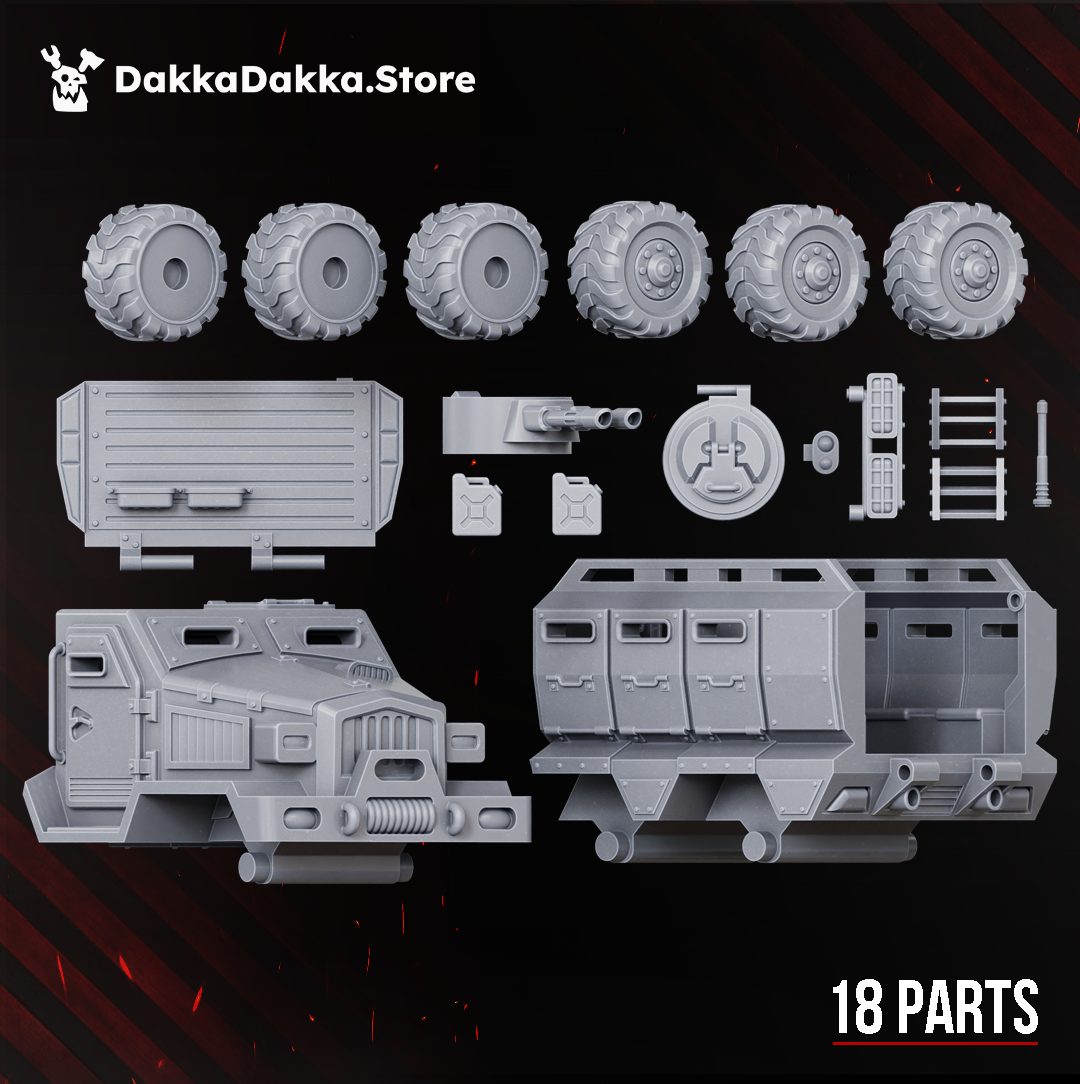
The kit comes in 18 parts and measures approximately 135mm long, 69mm tall, and 58mm wide. The vehicle body splits into a detailed cab section and a reinforced troop compartment, each panel lined with rivets, hatches, grab rails, and armoured shutters that reward close inspection. A rotating turret mount with twin-barrelled autocannon sits on the roof, and the kit also includes a spare wheel assembly, two jerry cans, a side ladder, and an antenna to give the finished model that lived-in, campaign-worn character. Six oversized off-road wheels complete the silhouette, lending the D8 the kind of unstoppable, ground-eating presence that suits any war-torn battlefield.
This is a single-vehicle kit intended for adult hobbyists who want a centrepiece transport or a workhorse addition to a larger force. The level of surface detail across every panel makes it equally at home as a display piece or an active gaming model. Sculpted by DakkaDakka, the Dinofelis WTV D8 scales well alongside 28mm to 32mm infantry figures.
Painting Guide: Dinofelis WTV D8The vehicle's broad armour panels and wealth of smaller accessories give you plenty of room to tell a story through paint. The guide below walks through a recommended sequence from primer to finished weathering.
1. Prime
- Apply a grey or black primer over all parts before assembly to ensure full coverage in recesses and around wheel hubs.
- A light zenithal coat in white from above helps map light and shadow before any colour goes down.
2. Armour Base
- Base coat the main panels in a deep military olive green such as Castellan Green or equivalent.
- Thin the paint to two or three light coats rather than one heavy pass to preserve edge sharpness.
3. Trim and Details
- Pick out metal framework, rivets, hinges, and the exhaust in a dark iron or gunmetal tone.
- Paint grab handles and ladder rungs in a slightly lighter metal to separate them from the structural frame.
4. Weapons
- Base the autocannon barrels in a dark steel, then edge highlight with a brighter silver toward the muzzle to suggest wear from firing.
- Paint the turret housing the same olive as the hull, then add a thin metal drybrush along raised edges where crew hands would grip.
5. Weathering
- Apply a brown or dark grey wash across the whole model and let it pool in panel lines, bolt heads, and vent slots.
- Drybrush the lower hull and wheel arches with a dusty tan or raw umber to suggest road mud and prolonged field use.
- Add small chips and scratches to armour edges with a fine brush and a chipped metal mix of dark brown underneath and silver on top.
6. Bases
- If mounting on a base, consider rubble, cracked earth, or churned mud textures to complement the vehicle's aggressive off-road stance.
- A final matte varnish protects the paint job and removes any distracting shine from washed or highlighted surfaces.
This is an adult hobbyist collectible, not a toy. Not suitable for children under 14 years due to small, detailed parts.
 Designed by
DakkaDakka
View all 347 miniatures
Designed by
DakkaDakka
View all 347 miniatures