Create Your Miniature Bases Using Natural Materials. Part Five: Crafting Custom Water Effects for Bases
Share
Water Effects: Bringing Liquid Life to Your Miniatures
In our last post, we explored the versatility of sand, gravel, and soil in grounding your miniatures within their environment. Now, we’re diving into an exciting and transformative technique: crafting custom water effects. From glistening puddles to turbulent rivers, adding water elements to your bases can elevate your miniatures and give your scenes a dynamic, lifelike quality.
Why Add Water Effects?
Water effects bring a sense of movement and realism to your bases. Whether you're creating a swamp for a lurking predator, a tranquil pond for an enchanted forest, or the aftermath of a rainy battlefield, water can add narrative depth and visual interest. With a bit of patience and creativity, you can craft scenes that truly stand out.
Materials for Creating Water Effects
The tools and products you’ll need depend on the scale and complexity of your water features. Here are some essentials:
- Two-Part Epoxy Resin: Ideal for creating deep water effects like ponds, rivers, and streams. It dries clear and can be tinted with inks or paints for desired coloration.
- UV Resin: A quicker alternative for small, shallow features like puddles or wet ground.
- Gloss Varnish: Perfect for simple effects, like a sheen on wet surfaces or thin layers of water.
- Acrylic Gels and Mediums: Use these for creating waves, ripples, or other surface textures.
- Tinting Agents: Alcohol inks, acrylic paints, or specialized resin dyes can add color to your water.
- Miscellaneous Tools: Mixing sticks, disposable cups, fine brushes, and pipettes for precision work.
Techniques for Crafting Water Effects
1. Shallow Water: Puddles and Wet Surfaces
Great for quick details, puddles or thin water effects add subtle realism to muddy or urban bases.
- Preparation: Seal your base first to prevent glue or varnish from soaking into the material.
- Application: Apply gloss varnish in thin layers for a wet-look finish or small puddles. For added depth, layer UV resin and cure it with a UV lamp.
- Detailing: Use dark brown or green paints underneath to create the illusion of murky water. Add tiny debris like grit or static grass for realism.
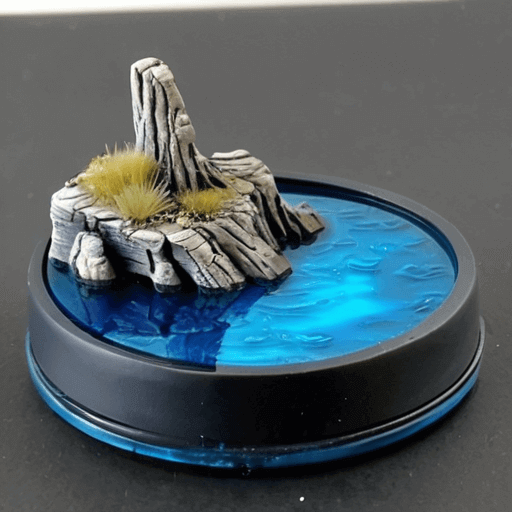
2. Standing Water: Ponds and Pools
For deeper features like ponds, use epoxy resin for a clear, glass-like finish.
- Building a Dam: Use tape or sculpting putty to create a barrier around the area where you’ll pour resin. Ensure it’s watertight!
- Mixing Resin: Follow manufacturer instructions carefully. Add a drop or two of ink or paint to achieve the desired color, keeping in mind that water tends to look darker in depth.
- Pouring in Layers: For deep water, pour the resin in thin layers, letting each layer cure before adding the next to avoid overheating or bubbles.
- Surface Texture: Once the resin sets, use gloss varnish or acrylic gel to add ripples or subtle waves.
3. Flowing Water: Streams and Waterfalls
Flowing water features like streams or waterfalls are trickier but incredibly rewarding.
- Base Layer: Use a shallow layer of resin or acrylic medium to establish the streambed.
- Ripples: For surface texture, apply acrylic gel with a toothpick or sculpting tool to create rippling effects.
- Waterfalls: Cut strips of clear plastic (from blister packs, for example) and coat them with gel medium. Attach these to the base and blend with resin or gel for a seamless look.
Enhancing Water Features
The details you add around your water can make all the difference. Consider these additions:
- Vegetation: Use static grass, tufts, or model foliage to suggest plant life around the water’s edge.
- Debris: Scatter small rocks, twigs, or even miniature barrels and crates for narrative depth.
- Wildlife: Add tiny fish, frogs, or waterfowl for a lively touch.
Inspiration for Water-Effect Bases
- Swampy Battlefield: Combine murky resin pools with tufts of moss and scattered bones for a foreboding, war-torn look.
- Enchanted Forest: Use crystal-clear resin for ponds, surrounded by vibrant greenery and flowers for a magical feel.
- Rain-Soaked Streets: Thin gloss varnish applied over asphalt-textured bases creates the illusion of wet urban terrain.
Final Thoughts
Water effects can transform a base from ordinary to extraordinary, adding layers of storytelling and realism. Start small, experiment with materials, and let your imagination flow. With practice, you’ll master the art of liquid textures, turning your bases into stunning dioramas.
Check out our miniatures to add to your custom bases
Next in the Series: Enhancing Miniature Bases with Snow and Ice
In the next post, we’ll tackle the art of winter bases. Learn how to create realistic snowdrifts, frosty ground, and icy textures for your cold-weather miniatures!