Create your miniature bases using natural materials. Part Two: Small Rocks and Moss
Share
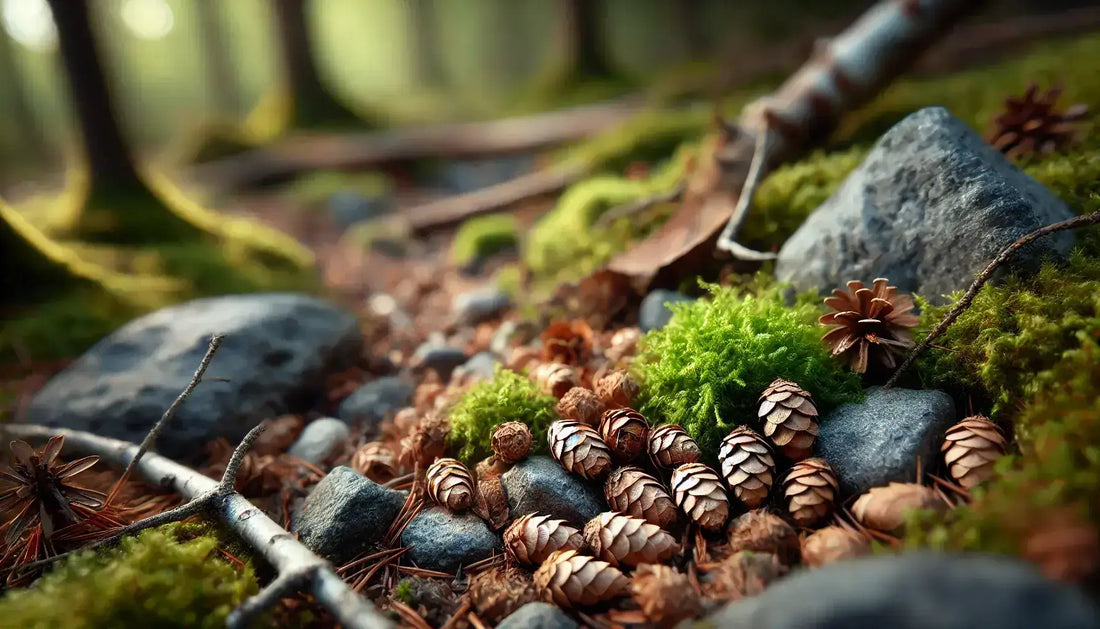
Welcome back to our series on using natural materials for miniature bases! In Part One, we transformed birch seed casings into delicate leaf effects, adding a layer of realism to our miniature scenes. Now, we’re shifting focus to two more materials that are easy to source: small rocks and moss. These materials are excellent for building up textured ground effects that look like true-to-life forest floors or rugged terrains. With a few simple techniques, we can turn these into striking, durable additions to your bases.
Why Use Small Rocks and Moss?
Small rocks and moss are incredibly versatile for basing. Rocks help add weight, dimension, and realism, while moss serves as an excellent way to simulate ground cover or overgrowth. Together, they create the impression of an untouched landscape, where your miniatures are part of a natural scene. Additionally, moss offers a way to introduce rich textures and colors that can mimic vegetation, from deep greens to earthy browns.
Where to Find Small Rocks and Moss
One of the best parts of using these materials is how easy they are to source! Here’s where you’re likely to find them:
- Local Parks and Woodland Trails: Parks and trails are full of rocks in various sizes. Look along pathways or near stream beds where pebbles naturally collect. Moss is often found on fallen branches, tree trunks, and shaded ground areas.
- Garden Centres: Many garden centres sell small bags of decorative rocks and moss for potted plants and terrariums. Look for options like pea gravel, which can be perfect for a scaled-down rocky effect.
- DIY Stores: Landscaping gravel and decorative moss can be found in the garden section of most DIY stores. They usually come in larger bags, so consider sharing wth fellow hobbyists if you don’t need a huge amount.
- Your Own Garden: If you have a garden, you might be surprised at how much material is already available. Small rocks can often be found in flowerbeds or around paths. Moss can grow naturally in shaded, damp areas, especially near fences or under shrubs.
Preparing Rocks and Moss for Miniature Basing
Cleaning and Selecting Small Rocks
Once you’ve gathered your small rocks, it’s essential to clean them to remove any dirt or loose debris. Here’s how:
- Rinse and Dry: Give the rocks a quick rinse under water to remove any mud or dust. Spread them out on a paper towel and let them air dry completely.
- Choose Appropriate Sizes: For miniature bases, aim for rocks no bigger than a pea. If they’re slightly too large, use a hammer to carefully break them into smaller pieces.
Preserving Moss
Fresh moss can decay over time, so if you’re using natural moss, it’s best to preserve it. Here are two simple methods:
- Drying: Lay the moss out on a paper towel and leave it in a warm, dry place for a few days. Once dry, it can be glued directly onto bases.
- Glycerin Solution: To keep moss soft and flexible, soak it in a mixture of one part glycerin to two parts water for about 15 minutes. Let it dry overnight before use. This method helps the moss retain a natural, green look without becoming brittle.
Using Rocks and Moss on Miniature Bases
Applying Small Rocks
After cleaning and sorting, small rocks are ready for basing:
- Positioning: Use rocks sparingly to avoid overcrowding. Position them to look like they’ve naturally settled in your scene—around roots, near the edges of paths, or scattered unevenly.
- Glueing: A tiny dab of super glue or PVA glue will hold each rock in place. For larger areas, spread a thin layer of glue and press the rocks lightly into it.
- Sealing: For extra durability, spray a coat of matte sealant over the rocks. This will help keep everything in place, especially if you’re handling the bases frequently.
Adding Moss for Realistic Ground Cover
Now for the moss! Depending on the look you’re aiming for, you can apply moss sparingly or use it to cover larger areas:
- Glue Application: Apply a thin layer of PVA glue to the area where you want the moss. Carefully press small patches of moss onto the glue, arranging it to resemble natural growth patterns.
- Blending with Other Elements: To avoid harsh edges, tuck bits of moss around rocks or other basing materials. You can also gently pull the moss apart to create a finer texture.
- Optional: Painting and Sealing: If you’re after a specific color, you can lightly dry-brush the moss with greens or browns for a different tone. Finish with a matte sealant to lock in the color and prevent fading.
Ideas for Rock and Moss Basing
With small rocks and moss, you can create endless scenes, from serene forest floors to rugged, battle-scarred terrain. Here are a few ideas:
- Woodland Paths: Use rocks to form a winding path, with patches of moss on either side. This setup works particularly well for forest-themed miniatures.
- Ruins and Rubble: Combine rocks and moss with broken bricks or small bits of slate for an ancient ruin effect.
- Wetlands or Swamps: Apply moss generously, blending in darker greens and browns to replicate a damp, overgrown look. For added effect, use a gloss varnish on certain areas to give the illusion of waterlogged ground.
Final Thoughts
Natural materials like rocks and moss bring a level of realism to miniature bases that’s hard to achieve with synthetic products alone. These textures and colors echo what we see in the real world, grounding your miniatures in authentic, lived-in settings. In the next part of this series, we’ll explore how to incorporate sticks, roots, and bark for creating even more complex terrain.
Check out our miniatures to add to your custom bases